In this guide, we’ll show you how to install and activate Windows 11. Click one of the buttons below to choose your starting point:

Installation of Windows 11 with USB Flash Drive #
Here we describe how to install Windows 11 using USB. You will need a USB flash drive with at least 8 GB to follow the guide, if you want to perform a clean installation.
Step 1: Download Media Creation Tool #
Press the button below to download the “Media Creation Tool” from Microsoft’s official download page.
Download
Step 2: Open the tool #
Once the tool is downloaded, open it.
Step 3: Accept the license terms #
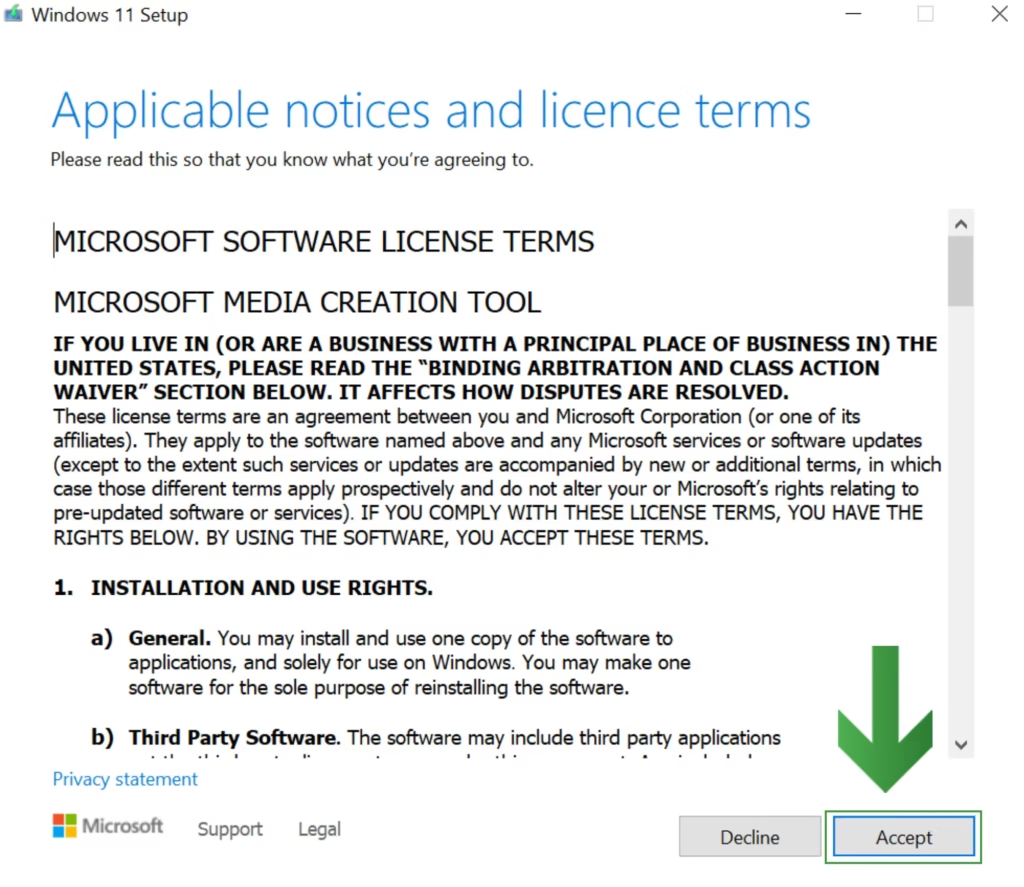
When the tool starts, you will come to the license terms, press “Accept” to accept the license terms and continue.
Step 4: Select language #
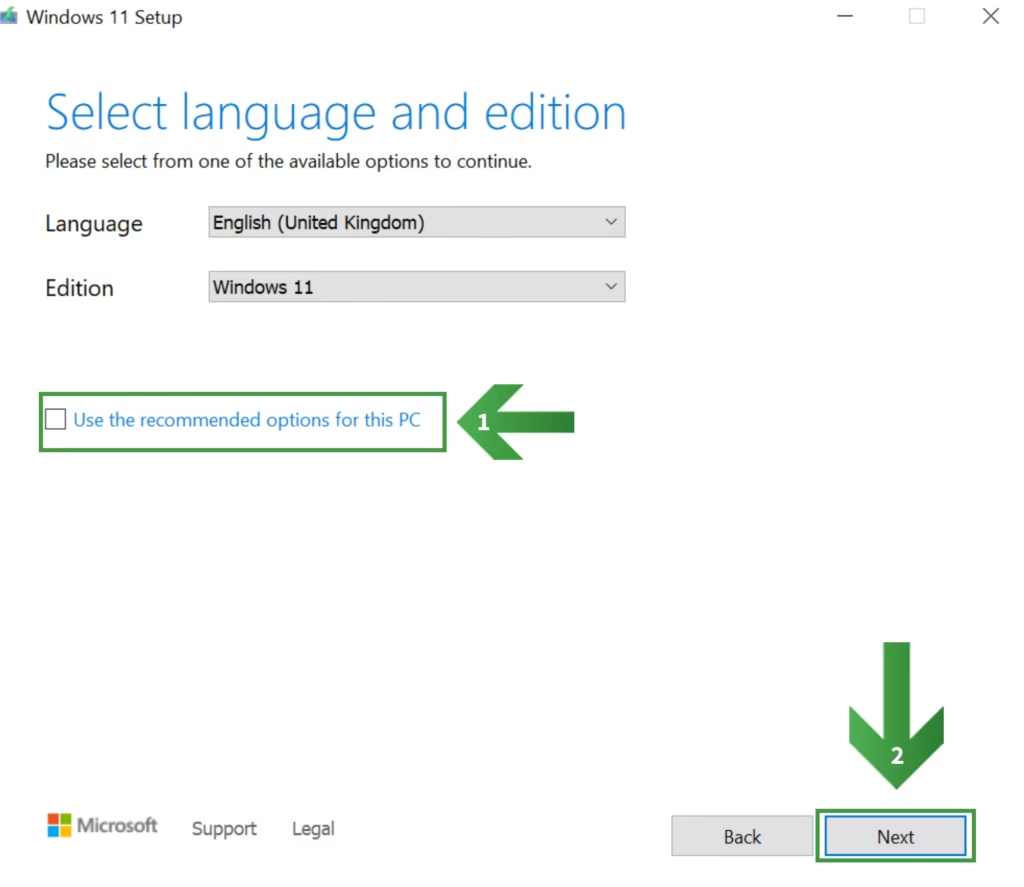
Select your preferred language and click “Next” to proceed.
Step 5: Choose USB-flashdrive #
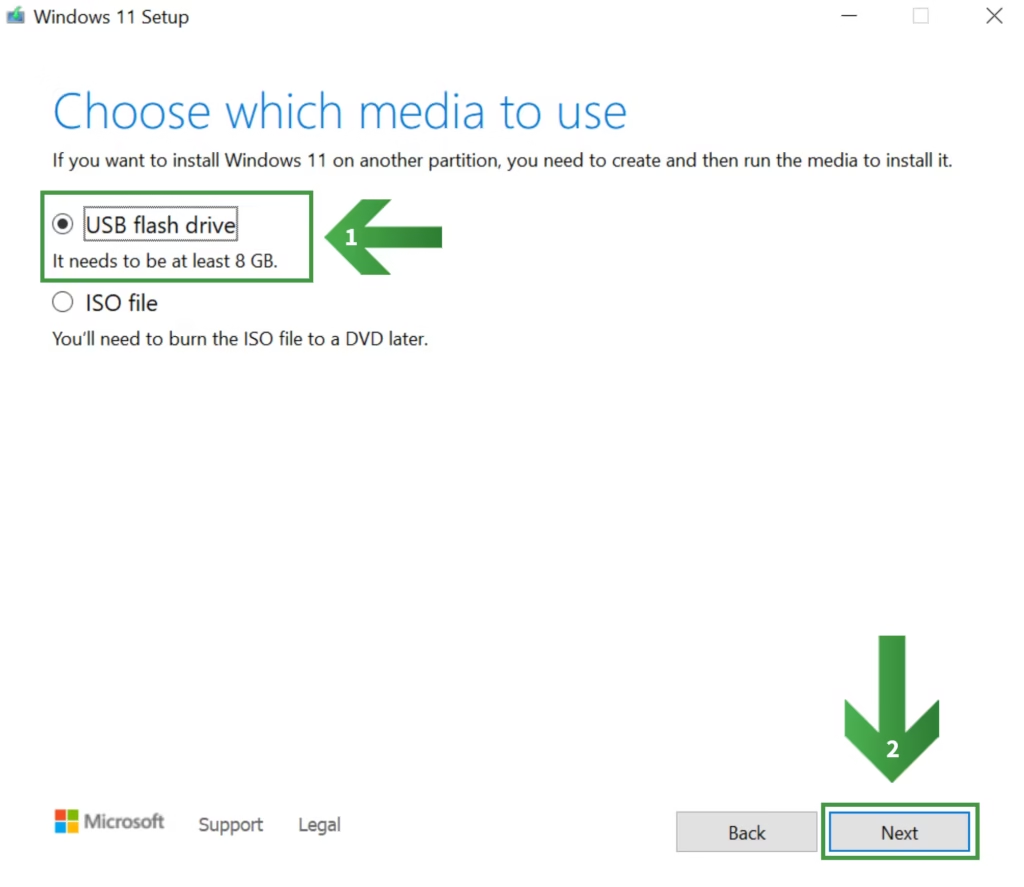
Now select that you want to create your Windows 11 installation file on a “USB flash drive” and then press “Next”.
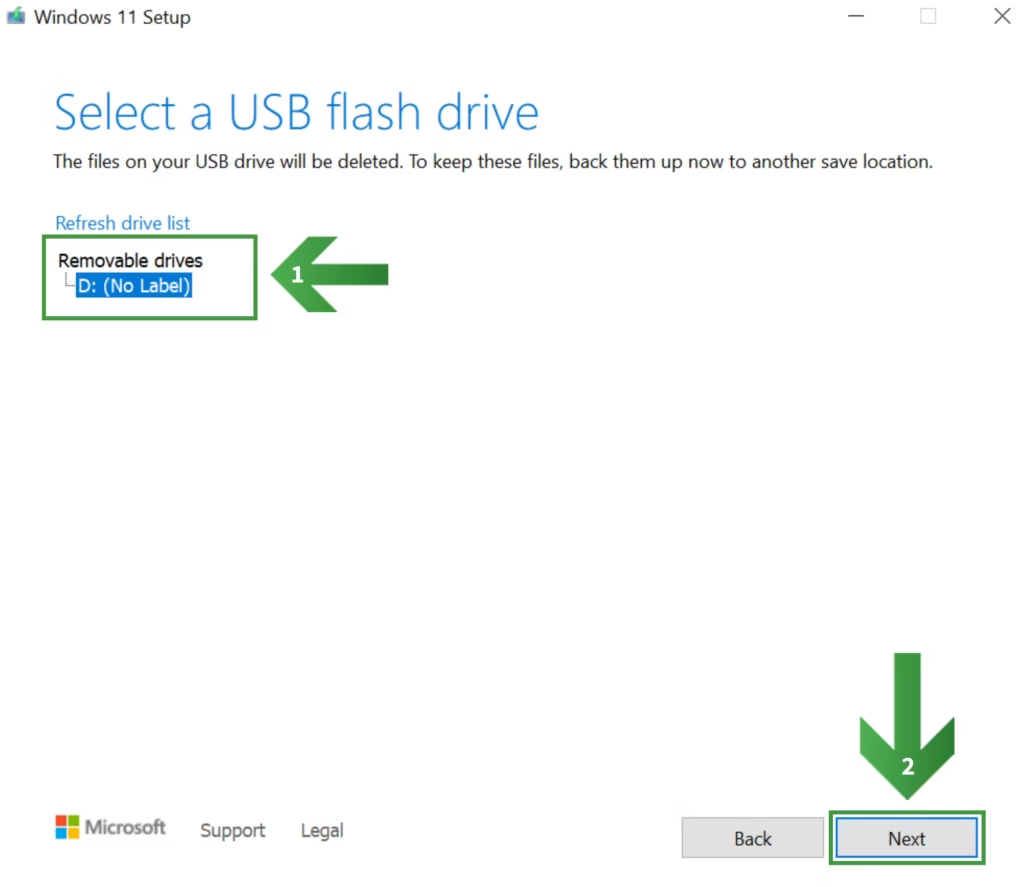
Step 6: Select USB-flashdrive #
Select your USB flash drive from the list of removable devices and click “Next”.
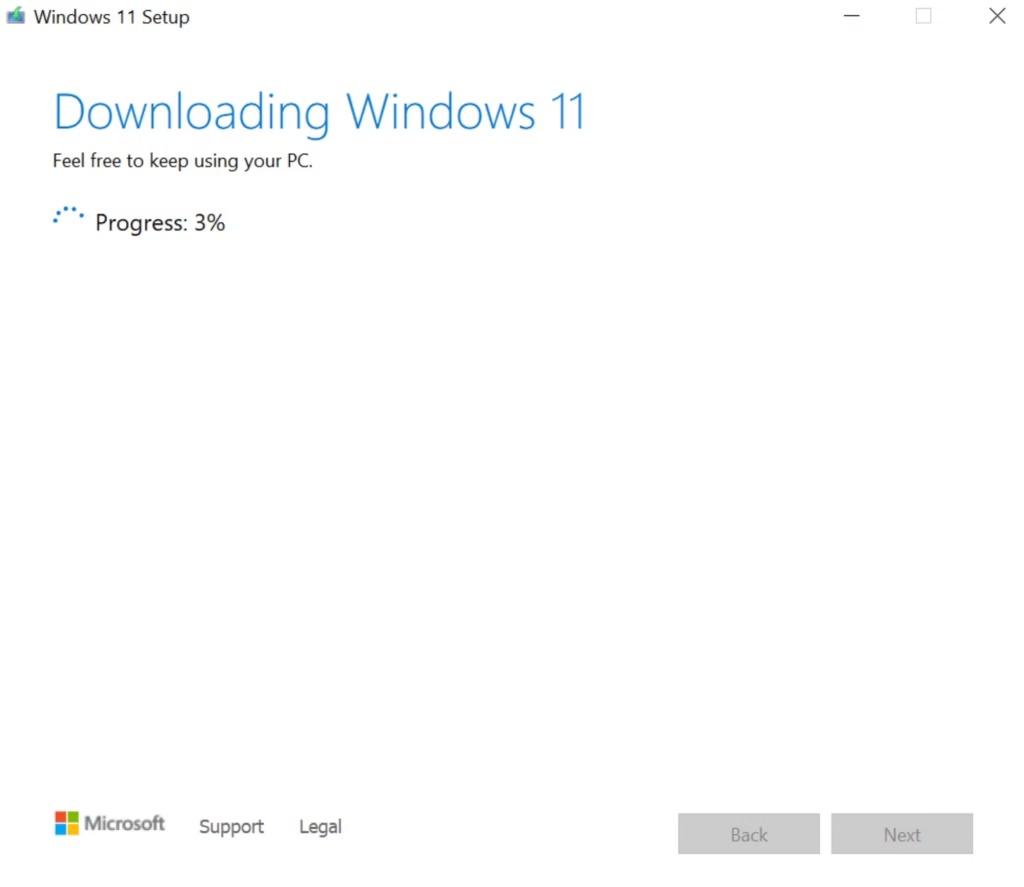
Step 7: Wait for the download #
Now wait until the Windows 11 tool has been downloaded to your USB flash drive, it may take a few minutes for the download to complete.
Step 8: Complete #
Now the USB flash drive is ready to use, click “Finish”. You are now ready to install Windows 11 on your computer, follow the steps below to install Windows 11 using your USB flash drive.
Step 1: Turn off the computer and connect the USB drive #
Begin by shutting down your computer. Insert the USB drive into one of your computer’s USB ports and then power on your computer.
The installation should automatically start, allowing you to proceed to Step 2. If it doesn’t, follow these steps to instruct your computer to boot from the USB flash drive:
- To enter the motherboard settings (BIOS), start the computer and immediately and repeatedly press either “DELETE”, “F2”, “F8” or “F1”, usually it appears during the boot phase of the computer which key to press to enter “BIOS”.
- Once you are in the BIOS, look for “Boot Priority” or “Boot Order”, usually the option is under “Settings”.
- Press “Boot Option #1” and choose to start the computer from our USB flash drive.
- Exit the BIOS and restart the computer by selecting “Exit and Save Settings”.
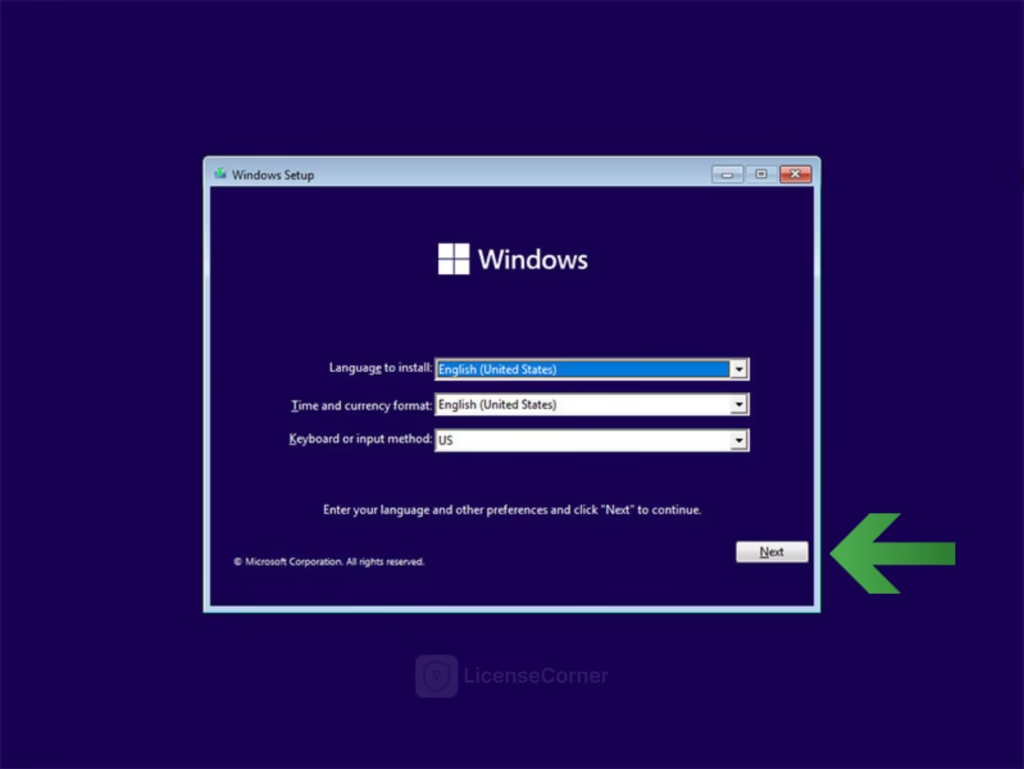
Step 2: Choose language and other preferences #
Now select your language, time and currency format, and keyboard layout for Windows 11 and click “Next”.
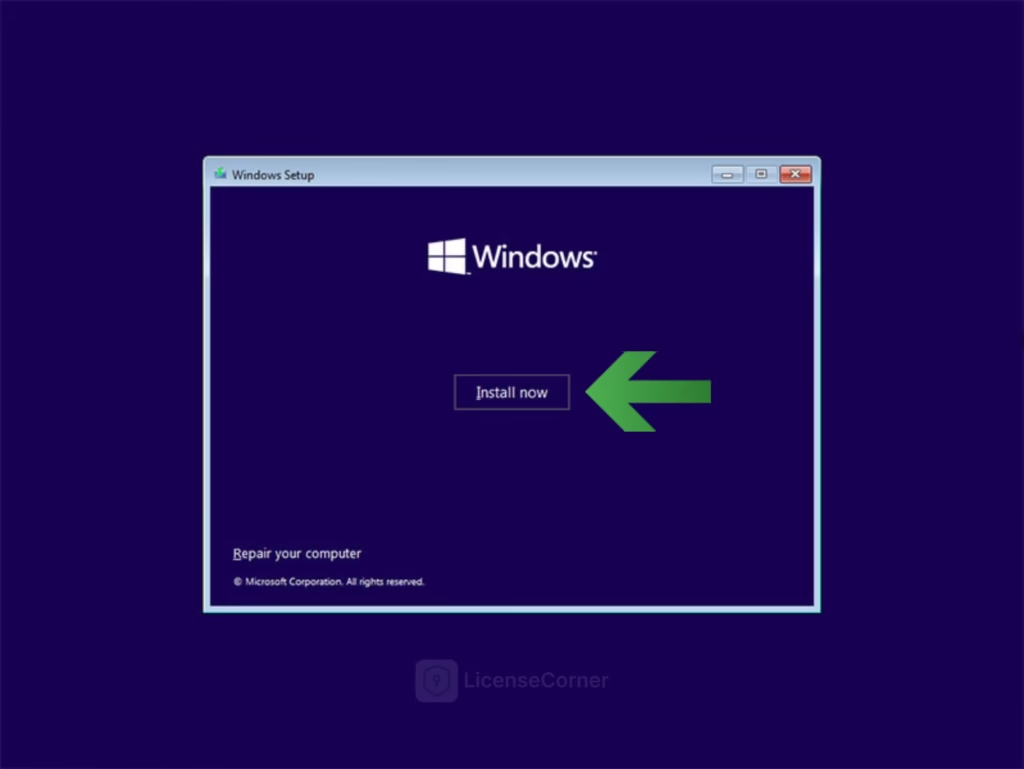
Step 3: Start the installation #
Tap “Install now” to continue.
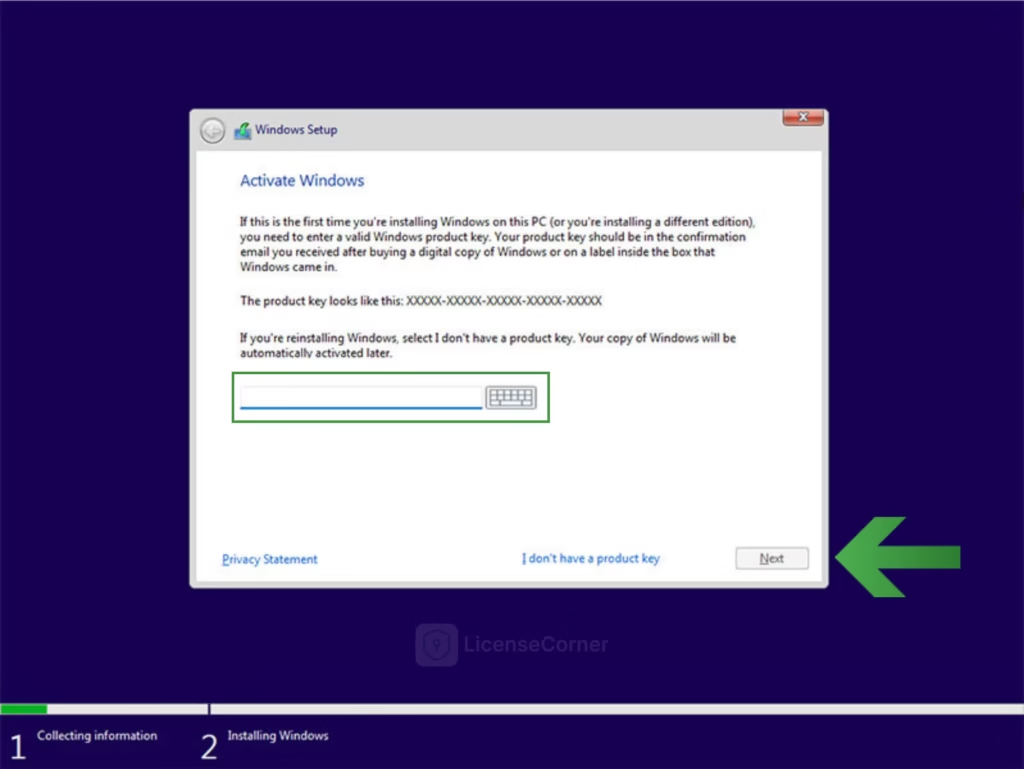
Step 4: Enter your license key #
You will now be asked to enter a product key for the installation. Enter the license key you received in an email from us and press “Next”
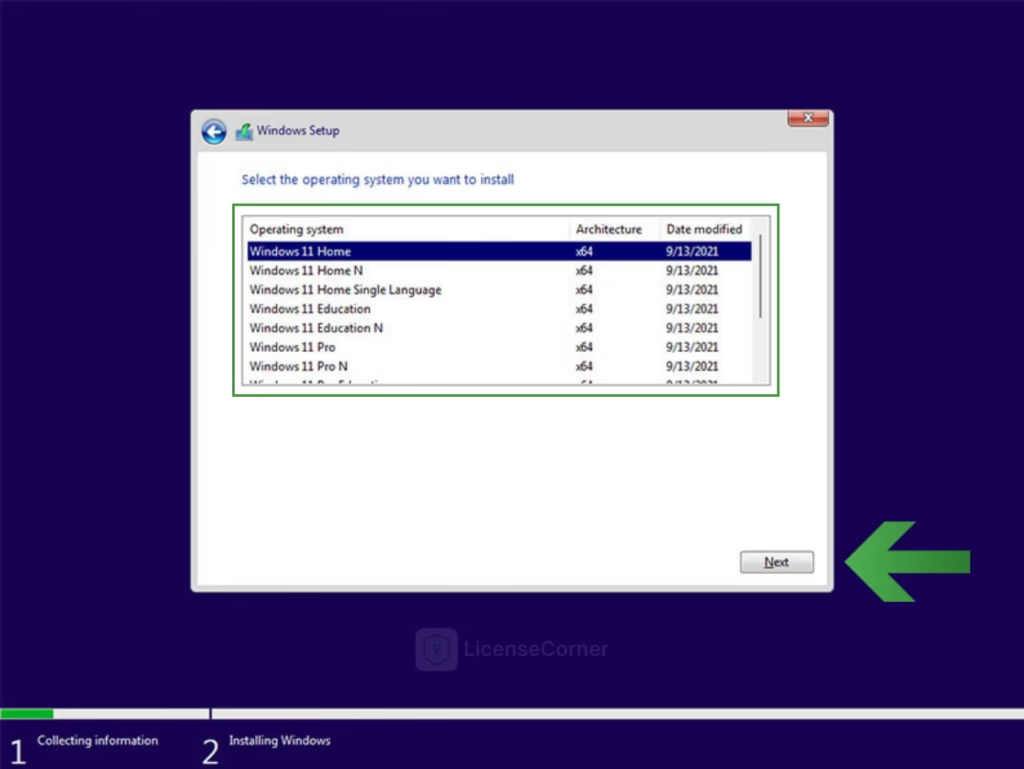
Step 5: Select version of Windows 11 #
Select which operating system you want to install on your computer (Windows 11 Pro / Windows 11 Home), and then press “Next”.
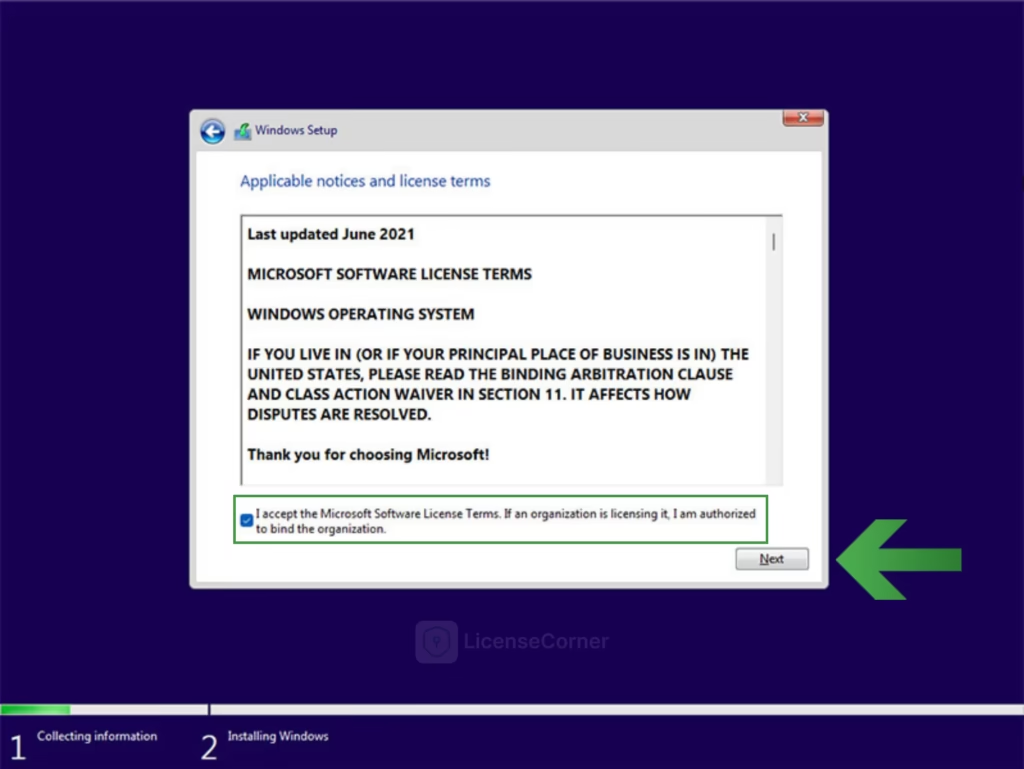
Step 6: Accept license terms #
Now accept the license terms for the software by checking “I accept the license terms” and then press “Next”
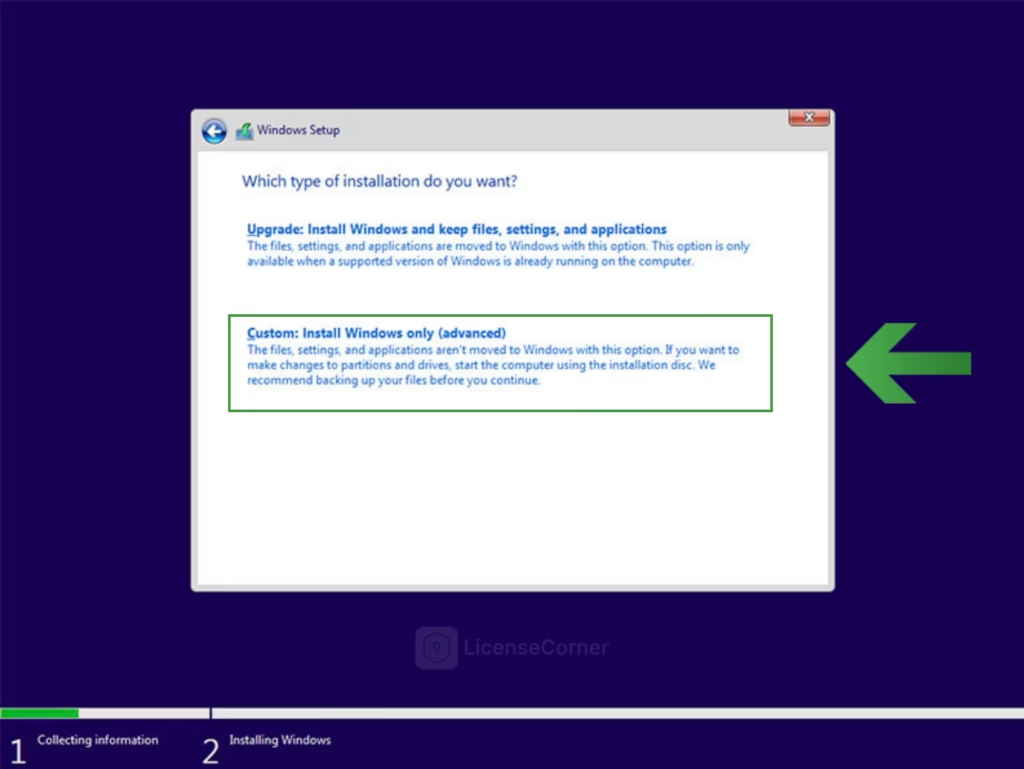
Step 7: Select installation type #
Select the type of installation you want to perform. To perform a clean installation, select “Custom: Install Windows only (Advanced)“.
Step 8: Choose a hardrive #
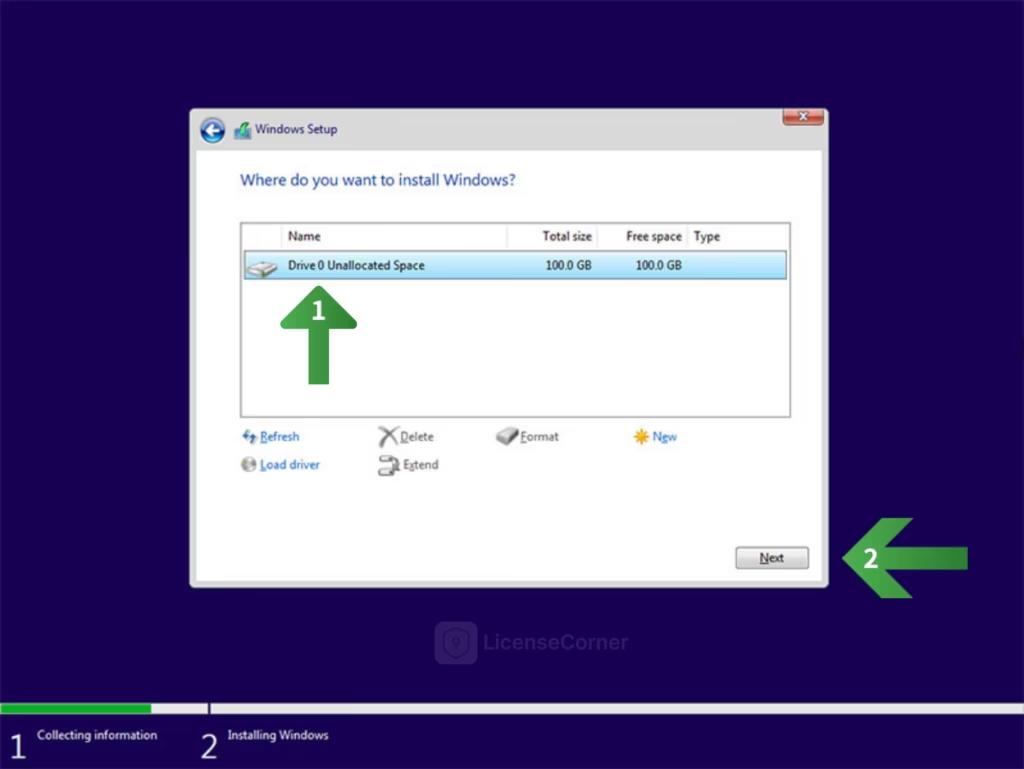
Select an empty hard drive to install Windows 11 on and click Next to begin the installation.
If you need to use a non-empty hard drive, choose the drive and click Delete or Format. Then, select the hard drive and click the corresponding buttons below it.
Finished #
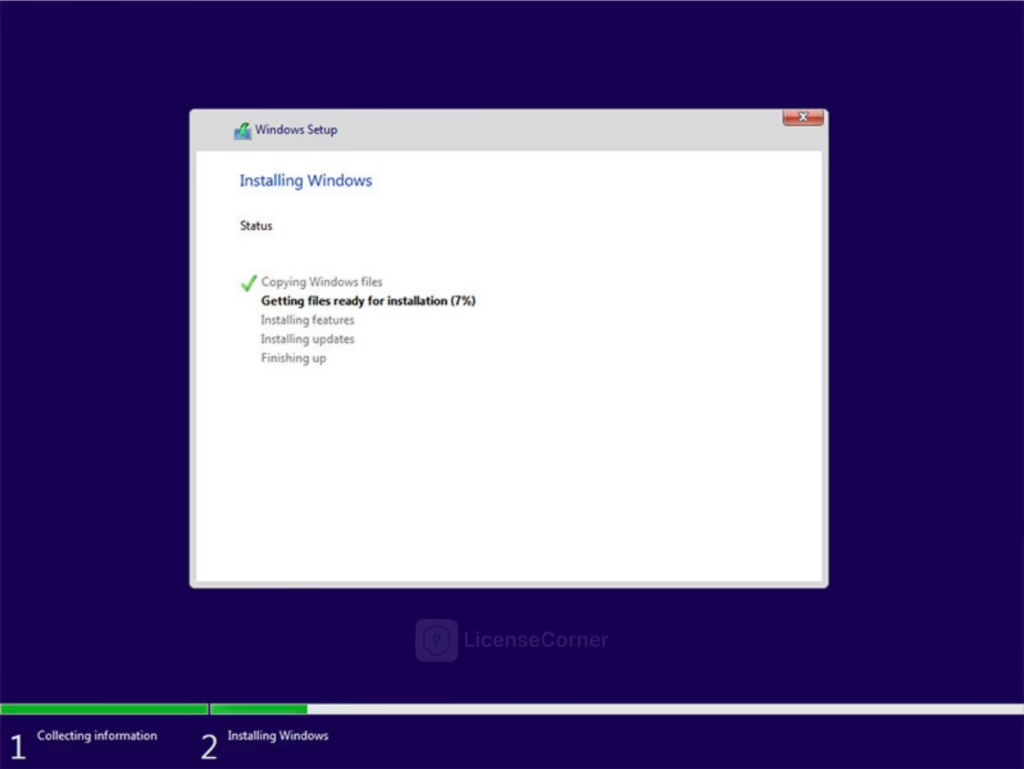
The installation wizard will now start transferring Windows files to your computer. This process’s duration may vary depending on your system and could take some time.
Upon completion, your computer will reboot. In some cases, you might get stuck in a boot loop where the system tries to return you to the installation process. This can occur if the system is attempting to read from the USB drive instead of the hard drive where the OS was installed. If this happens, remove the USB drive and restart your computer.